


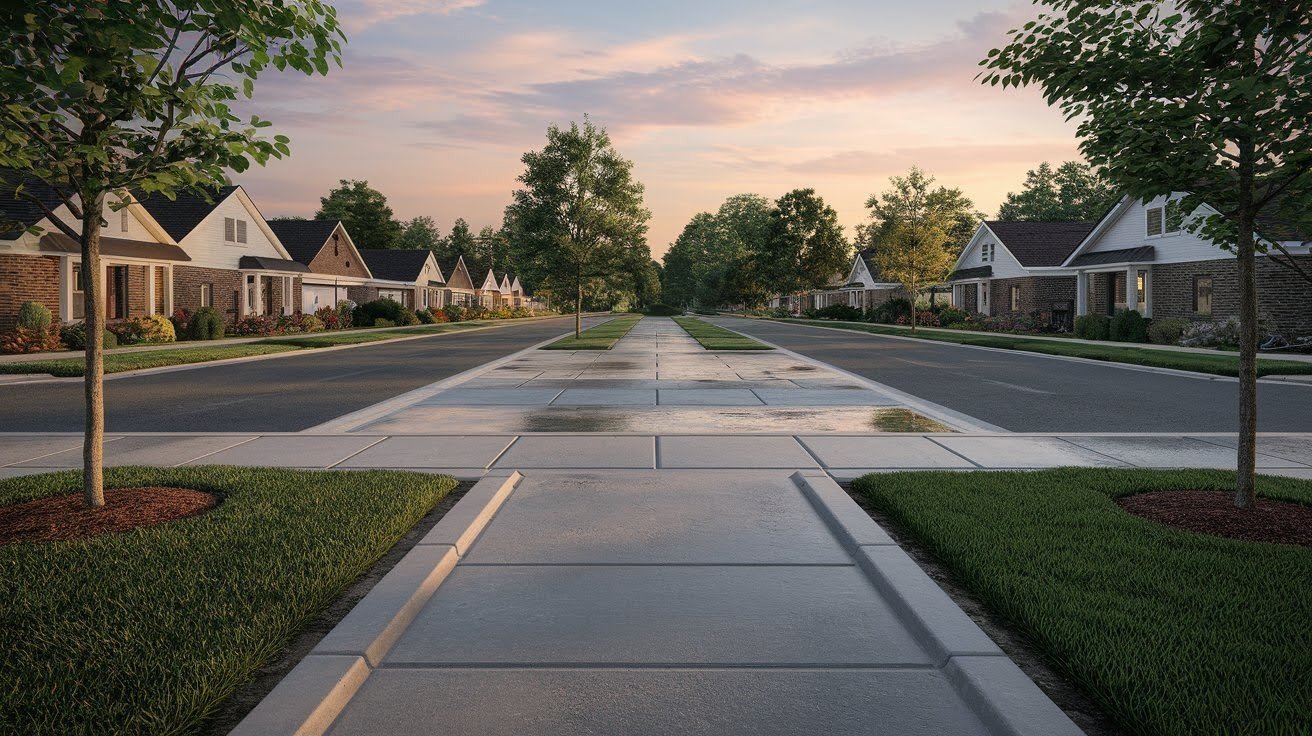
I see concrete sidewalks everywhere. They connect our homes to the street. They guide visitors to our front doors. They make neighborhoods look complete and well-maintained.
More homeowners are choosing to install their sidewalks. Custom designs are becoming popular too. You can create patterns, colors, and textures that match your style.
The best part about concrete sidewalks is how long they last with proper care. I’ve seen sidewalks from the 1960s still looking good today. That’s because concrete gets stronger over time when you treat it right.
In this guide, I’ll show you everything about concrete sidewalks. You’ll learn what they are and why they work so well. I’ll walk you through planning and installation.
We’ll cover maintenance that keeps them looking great for years. Plus, I’ll share design ideas that will inspire your next project.
What Is a Concrete Sidewalk?

A concrete sidewalk is a paved walkway made from cement, sand, gravel, and water. Simple as that.
You find them everywhere. Outside homes connect to driveways. At businesses leading to entrances. In parks, creating safe walking paths. They’re the backbone of pedestrian traffic.
It lasts decades with minimal care. The weather doesn’t hurt it much. Concrete handles it all like snow, rain, and heat
The benefits are clear:
- Extremely durable material
- Requires little ongoing maintenance
- Can last 25-30 years or more
- Supports heavy foot traffic
- Works in all climates
Planning Your Concrete Sidewalk
Good planning prevents problems later. Start with your site.
- Check The Slope: Water needs somewhere to go. A slight slope away from buildings prevents pooling. Aim for 1/4 inch drop per foot of length.
- Consider Drainage: Where will water flow? Make sure it goes toward grass, gardens, or storm drains. Not toward foundations or a neighbor’s property.
- Measure Access Routes: Can concrete trucks reach your site? If not, you might need wheelbarrows or pumping equipment. This affects your budget.
- Research Local Codes: Most areas require permits for new sidewalks. Check setback requirements from property lines. Some neighborhoods have style guidelines, too.
- Mark Your Path: Use spray paint or stakes with string. Walk it several times. Make adjustments before you start digging.
- Choose Your Concrete Mix: Standard mix works for most sidewalks. High-traffic areas might need stronger blends. Ask your supplier what they recommend.
Step-by-Step Concrete Sidewalk Installation
Tools and Materials Needed

Essential tools:
- Shovels for digging
- Rake for leveling
- A wheelbarrow for mixing
- Float for smoothing
- Edger for clean borders
- Broom for texture
Materials list:
- Concrete mix or ready-mix delivery
- Wooden or metal forms
- Rebar or wire mesh for strength
- Gravel for base layer
- Stakes to hold forms
- Release agent or oil
Preparing the Base
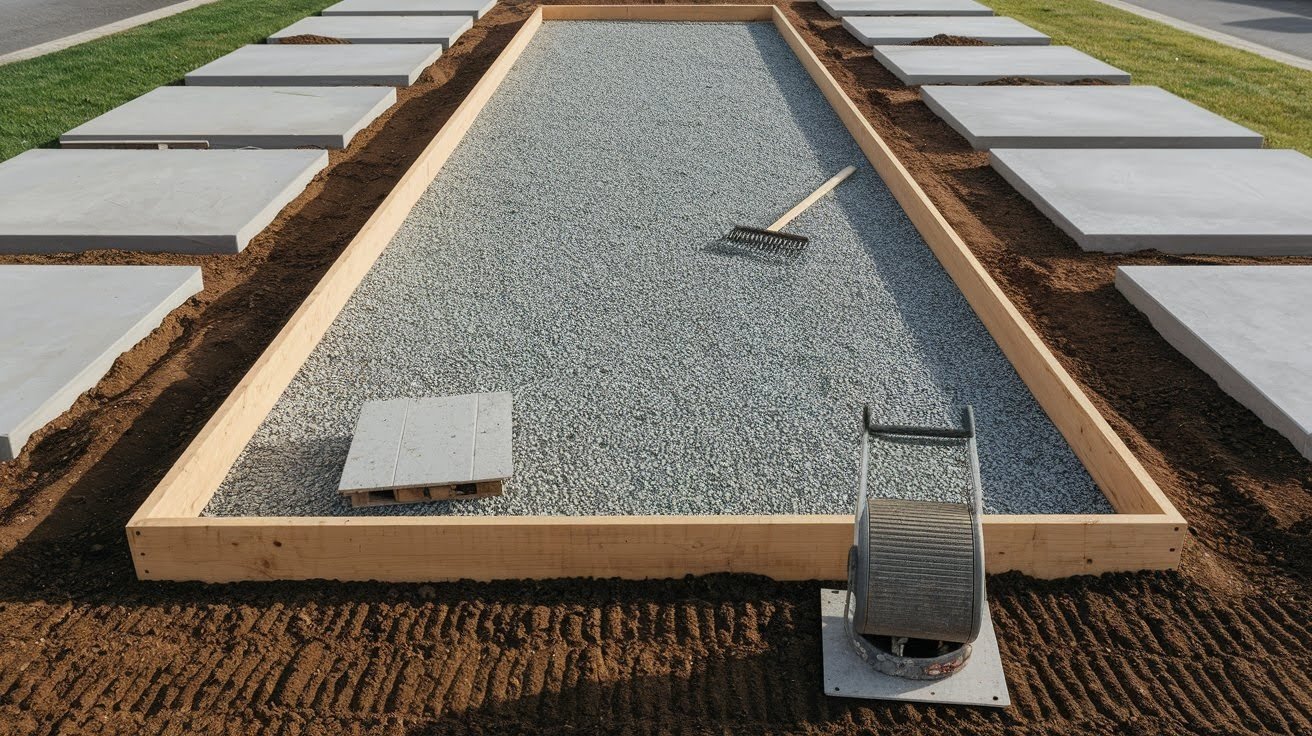
Dig out your path. Go 6-8 inches deep for most sidewalks. Remove all grass, roots, and debris.
Check for level as you work. Use a long board and a level tool. The base should follow your planned slope.
Add 2-3 inches of gravel. Compact it well. You can rent a plate compactor or use a hand tamper. This prevents settling later.
Set your forms next. These boards hold the concrete shape. Make them level and secure with stakes every 3-4 feet.
Pouring and Finishing
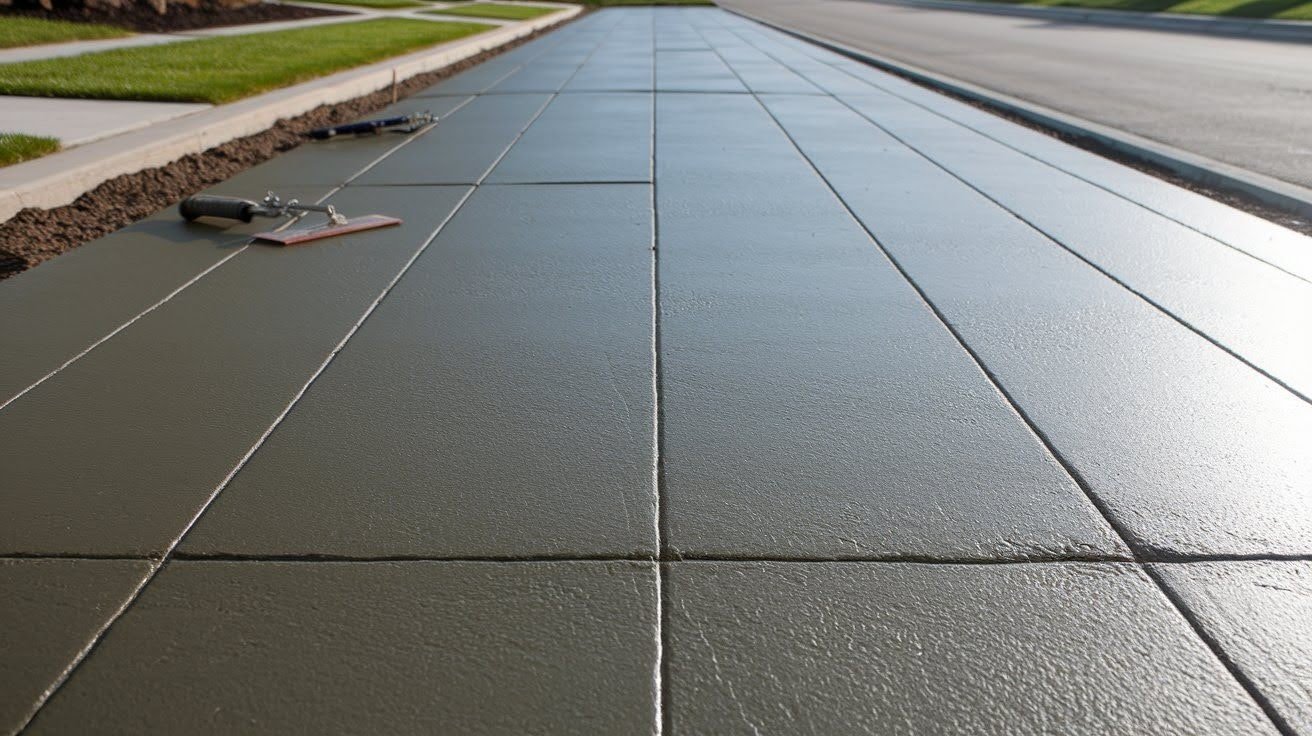
Order concrete or mix your own. For big jobs, delivery trucks save time and effort.
Pour concrete into forms. Start at one end and work methodically. Don’t dump it all in one spot.
Level with a screed board. Drag it across the forms to remove excess concrete. Fill low spots as needed.
Float the surface smooth. Wait until the water stops rising to the top. Then use your float in circular motions.
Add expansion joints every 4-6 feet. These prevent cracking from temperature changes. Cut them while the concrete is still workable.
Curing is critical: Keep concrete moist for 7 days minimum. Cover with plastic or spray with water regularly. Hot weather speeds drying – be extra careful.
Concrete Sidewalk Maintenance Tips

Clean concrete regularly to prevent stains from setting in.
For basic cleaning:
- Sweep away debris weekly
- Rinse with a garden hose monthly
- Use mild detergent for tough spots
- Avoid harsh chemicals that can damage the surface
Handle cracks quickly. Small cracks grow into big problems. Clean out loose debris first. Fill with concrete crack filler or caulk designed for outdoor use.
Seal every 2-3 years. Quality sealers protect against moisture, salt, and stains. Apply when the surface is clean and dry. Follow the manufacturer’s directions exactly.
Winter care matters. Remove snow promptly to prevent ice buildup. Use sand instead of salt when possible. Salt can cause surface damage over time.
Watch for settling or heaving. These usually indicate drainage problems underneath. Address them before they cause major cracking.
Popular Design Ideas for Concrete Sidewalks
Plain concrete doesn’t have to be boring. Modern techniques create amazing looks.
Stamped concrete adds texture and pattern.
Popular options include:
- Brick patterns
- Stone textures
- Wood plank looks
- Geometric designs
Colored concrete changes ordinary gray. Integral color goes throughout the mix. Surface stains create varied, natural looks.
Border treatments define your sidewalk:
- Contrasting colored edges
- Different textures along borders
- Decorative aggregate strips
- Brick or stone inlays
For lighting integration improves safety and appearance:
- Solar lights along edges
- LED strips in expansion joints
- Low-voltage path lighting
- Motion-activated options
Landscaping partnerships soften hard surfaces:
- Planted strips between sections
- Grass or groundcover borders
- Flower beds alongside paths
- Tree plantings for shade
Common Mistakes to Avoid
- This leads to cracking and settling problems later
- Too hot, cold, or wet conditions ruin concrete
- Temperature changes will crack solid slabs
- Weak concrete results from drying too fast
- Permits and inspections prevent costly do-overs
- Different applications need different strengths
- Standing water causes damage over time
- Uneven surfaces look bad and drain poorly
Conclusion
Concrete sidewalks combine practicality with style. They’re tough enough for daily use but flexible enough for creative designs.
I’ve shown you how to plan, install, and maintain quality sidewalks. The process isn’t complicated, but attention to detail matters. Take your time with preparation. Follow proper curing procedures. Regular maintenance prevents expensive repairs.
Remember the key points from this guide: proper base preparation prevents most problems, expansion joints control cracking, quality concrete mix matters for durability, and adequate thickness supports heavy use.
Your sidewalk investment pays off for decades. It boosts curb appeal immediately. It provides safe, reliable access in all weather. Plus, you get the satisfaction of building something permanent and useful.
Start planning your sidewalk project today. If you’re replacing an old walkway or creating a brand new path, these guidelines will help you succeed.
Frequently Asked Questions
How thick should a concrete sidewalk be?
Most residential sidewalks work well at 4 inches thick. High-traffic areas or heavy load zones may need 5-6 inches. Commercial applications often require 6 inches minimum.
Can I pour concrete directly on dirt?
No, you need a proper base. Remove grass and topsoil first. Add 2-3 inches of compacted gravel. This prevents settling, cracking, and drainage problems.
How long before I can walk on new concrete?
Light foot traffic is usually safe after 24-48 hours. Wait at least 7 days before heavy use. Full strength develops over 28 days with proper curing.
What’s the best time of year to install concrete sidewalks?
Spring and fall offer ideal conditions. Temperatures between 50-80°F work best. Avoid extreme heat, freezing weather, or rainy periods during installation and curing.
How do I prevent cracks in my concrete sidewalk?
Use proper base preparation, add expansion joints every 4-6 feet, ensure adequate thickness, and follow proper curing procedures. Control joints help cracks form in planned locations rather than randomly.